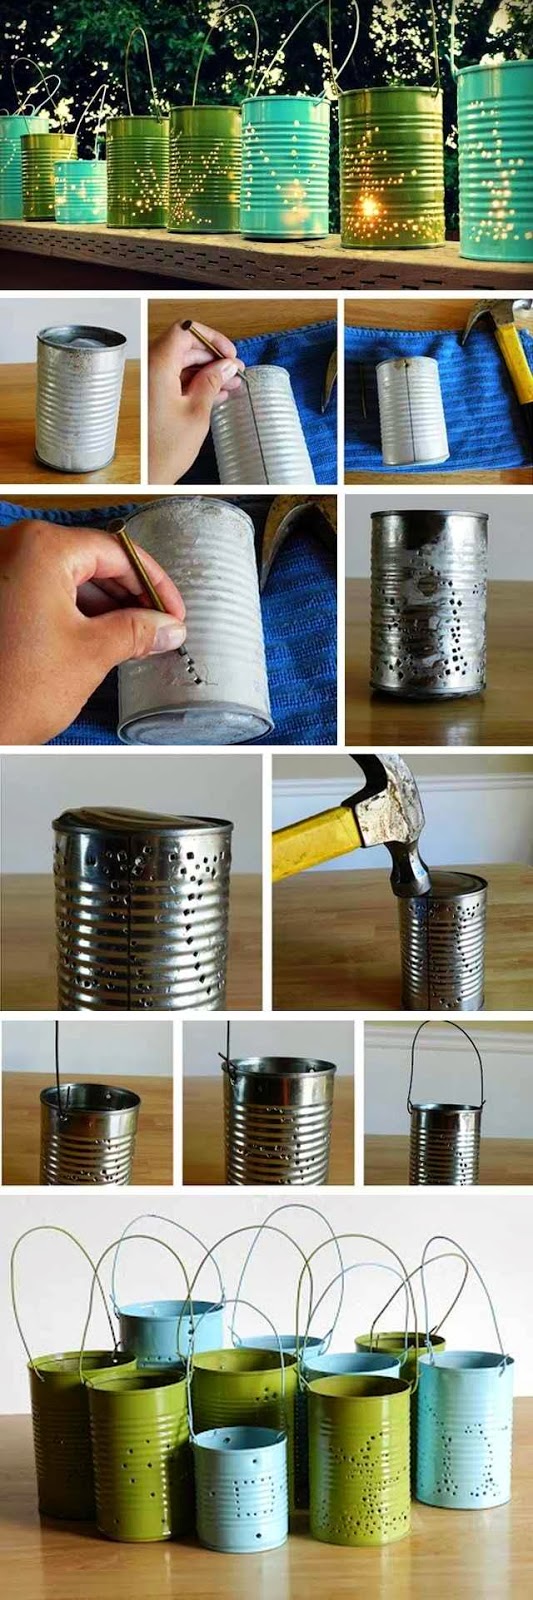
How to Make Garden Lanterns from Old Tin Cans
Light up the night with old tin cans. The rustic appeal will add warmth and
a glow to any boring summer evening. You will only need some any sized tin cans , leaves to use
as a pattern and a hammer and nails.
1. Clean up the tin can. Open each tin can and remove the top (along with
any contents). Remove labels and wash with warm soapy water. Dry completely.
2. Discard any cans that are damaged or rusted. Freezing the tin can first
will prevent your tin from being deformed once you start hammering it.
3. Fill the tin can up to 3/4 of its length with sand. This will prevent
bulging of the tin can when frozen. (Water expands when it freezes.)
4. Add water.
5. Place the tin can inside the freezer. Wait until the water freezes. Then remove the
tin from the freezer.
6. Choose a suitable leaf to place on tin can. Tape the leaf in place on
the can. Check that you like the placement and size before you begin to hammer.
7. Tap the first nail into the leaf, being careful not to rip or break the
leaf. Consider hammering the first nail toward the top of the leaf to stabilize
your design.
8. Hammer the remaining nails around the perimeter of the leaf in order to
create a pattern. Space the nail holes evenly so your design appears
symmetrical.
9. Remove the nails and pull or tear off the leaf to expose the design. You
should be able to see the same leaf pattern now outlined in nail holes on the
tin can.
10. Spray paint the can after you’ve created the design, so that you don’t
disturb the paint (painting beforehand may create a more rough exterior). Place
the tin can in an open, covered area. Spray paint it the desired color.
11. Allow the tin can to dry for up to 24 hours. However, most spray paints
will dry within 3 hours if left in a cool, dry area.
12. Fill the bottom of the can with sand. Fill it with about a ½ cup of
sand, depending upon the can size.
13. Place the votive in the middle of the can, resting on the sand.
14. Light the votive. (Or, turn on battery operated votive.) This will
light up the night.
15. You’re done! Enjoy! J